ensuring the security and performance of your website is not just beneficial—it’s essential. With the increasing prevalence of cyber threats and the need for fast, reliable access to content, integrating a solution like Cloudflare can dramatically enhance your website’s resilience and user experience. But how do you get started?
Many users wonder about the steps involved in enabling Cloudflare, what features it offers, and how it can specifically benefit their website. For instance, Cloudflare provides advanced security measures such as DDoS protection and improves page load speeds through its content delivery network (CDN).
How to Enable Cloudflare on Your Website (In 3 Steps)
Cloudflare is a powerful tool that enhances your website’s security, speed, and reliability by acting as a reverse proxy and content delivery network (CDN). By enabling Cloudflare, you can protect your site from DDoS attacks, optimize loading times, and gain access to advanced analytics. This guide will walk you through three simple steps to set up Cloudflare on your website, ensuring optimal performance and robust security for your online presence.

Step 1: Create a Cloudflare Account and Add Your Website
- Sign Up for Cloudflare:
- Navigate to the Cloudflare website.
- Click on the “Sign Up” button, typically found at the top right corner of the homepage.
- Enter your email address and create a strong password. Make sure your password includes a mix of letters, numbers, and symbols for better security.
- Verify Your Email:
- After signing up, you’ll receive a verification email. Click on the verification link in the email to confirm your account.
- Log In:
- Return to the Cloudflare website and log in using your newly created credentials.
- Add Your Website:
- Once logged in, you’ll see a prompt to add a website. Enter your full domain name (e.g., yourwebsite.com) and click “Add Site.”
- Cloudflare will initiate a DNS scan, which typically takes a few minutes. This scan identifies the existing DNS records associated with your domain.
- Review DNS Records:
- After the scan is complete, Cloudflare will present you with a list of DNS records it found. This includes A records (pointing to your server’s IP address), CNAME records (aliases for your domain), MX records (for email services), and any other existing records.
- Carefully review these records to ensure they accurately reflect your current settings. If you have custom records (e.g., for subdomains or specific services), make sure they are included.
- Choose a Cloudflare Plan:
- After reviewing your DNS records, you’ll need to select a Cloudflare plan. Cloudflare offers various options:
- Free Plan: Provides essential features like DDoS protection, basic security, and performance enhancements.
- Paid Plans: Offer additional features such as advanced security settings, performance analytics, and more robust support options.
- Select the plan that best fits your website’s needs.
- After reviewing your DNS records, you’ll need to select a Cloudflare plan. Cloudflare offers various options:

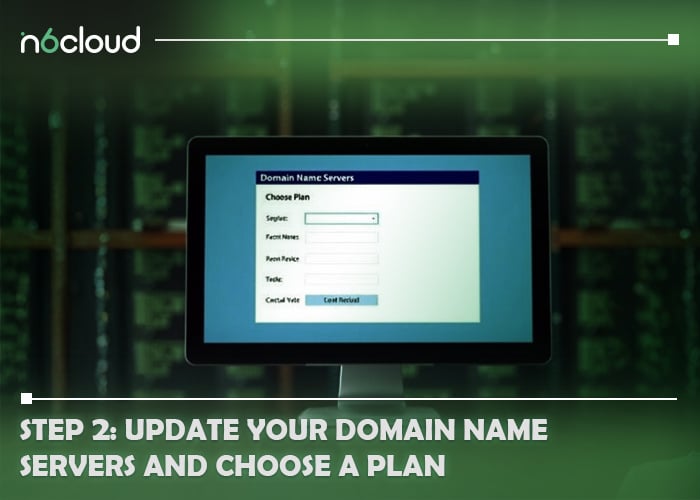
Step 2: Update Your Domain Name Servers and Choose a Plan
- Get New Nameservers:
- Once you’ve selected your plan, Cloudflare will provide you with two new nameservers (e.g., alice.ns.cloudflare.com and bob.ns.cloudflare.com). Write these down, as you will need them for the next step.
- Update Your Domain Registrar:
- Log in to your domain registrar account (the service where you purchased your domain).
- Locate the DNS or Nameserver settings for your domain. This is usually found under “Domain Management,” “DNS Settings,” or a similar section.
- Replace the existing nameservers with the two Cloudflare nameservers provided earlier. Ensure there are no typos, as incorrect entries can lead to website downtime.
- Save Changes:
- After entering the new nameservers, save your changes. Some registrars may require you to confirm this change via email or a verification prompt.
- Propagation Time:
- The update may take anywhere from a few minutes to 24 hours to propagate across the internet. During this time, your website might still connect to the old nameservers intermittently.
Step 3: Review Your Cloudflare Security Settings
- Access Cloudflare Dashboard:
- After the nameserver changes have propagated, log back into your Cloudflare account to access your dashboard.
- SSL/TLS Settings:
- Navigate to the “SSL/TLS” tab in your dashboard. You will see several options:
- Flexible: Encrypts traffic between the user and Cloudflare but not between Cloudflare and your server.
- Full: Encrypts traffic end-to-end; your server must have an SSL certificate, but its validity is not required.
- Full (Strict): Requires a valid SSL certificate on your server for end-to-end encryption. This is the most secure option.
- When configuring your SSL settings in Cloudflare, it’s crucial to select the option that aligns with your server’s SSL certificate status. If your server has a valid SSL certificate issued by a trusted Certificate Authority (CA), choose the Full (strict) mode. This setting ensures that Cloudflare verifies the origin server’s certificate, providing a higher level of security. However, if your server uses an expired or self-signed certificate, opt for the Full mode. In this mode, Cloudflare encrypts the connection to your origin server without validating the certificate, which is suitable for self-signed or invalid certificates. It’s important to note that while the Full mode offers encryption, it doesn’t verify the authenticity of the origin server’s certificate, potentially leaving your site vulnerable to certain security risks. Therefore, whenever possible, aim to use Full (strict) mode with a valid certificate to ensure optimal security.
- Navigate to the “SSL/TLS” tab in your dashboard. You will see several options:

- Firewall Settings:
To set up rules that block or challenge suspicious traffic, navigate to the Security section in your Cloudflare dashboard and select WAF from the sidebar menu. Within the WAF area, you can configure custom rules to manage and mitigate unwanted traffic effectively.
Create custom rules based on specific criteria, such as:
Blocking requests from certain countries.
Challenging requests from specific IP addresses or ranges.
Rate limiting to prevent abuse.
- Security Level:
- Under the “Security> Settings” tab, you can set the security level for your website. The options usually include[PS2] :
- Essentially Off: No protection against threats.
- Low: Challenges only the most obvious threats.
- Medium: Most traffic is allowed; suspicious requests are challenged.
- High: Most visitors are challenged.
- I’m Under Attack: Requires all visitors to pass a JavaScript challenge before reaching your site.
- Choose a level based on your website’s exposure and audience.
- Under the “Security> Settings” tab, you can set the security level for your website. The options usually include[PS2] :
- Caching Settings:
- Go to the “Caching” tab to manage how Cloudflare caches your content.
- Set the caching level to determine how long Cloudflare stores copies of your pages. Adjust the TTL (Time To Live) for your cache settings according to your content update frequency.
- Page Rules:
- If needed, set up Page Rules for specific behaviors on certain URLs (like bypassing cache or enabling specific features).
- Monitor Performance:
After completing your settings, regularly check your Cloudflare dashboard to monitor traffic, security events, and performance metrics. Utilizing Cloudflare’s analytics tools provides comprehensive insights into your website’s performance and security. Analyzing these metrics helps you understand how Cloudflare impacts your site’s speed and security, enabling data-driven decisions to enhance user experience. By staying informed about your site’s analytics, you can promptly address potential issues and optimize performance.
By following these detailed steps, you can effectively enable Cloudflare on your website, enhancing its security, performance, and resilience against various online threats.
In conclusion,
enabling Cloudflare on your website is a strategic move to enhance both its security and performance. By following the three essential steps—creating an account and adding your website, updating your domain name servers, and reviewing your security settings—you can ensure that your site is protected from potential threats like DDoS attacks and experiences faster load times through Cloudflare’s CDN. Additionally, optimizing settings for SSL, firewall, caching, and performance monitoring will provide a tailored security solution for your site. With Cloudflare’s robust features, you can improve user experience, increase reliability, and safeguard your online presence effectively.
How do I use a Content Delivery Network (CDN)?
To use a CDN, sign up with a CDN provider and configure your domain settings to point to their servers. Upload your static content (images, scripts) to the CDN, which then caches this content globally, reducing latency and improving load times for users.
How can I tell if Cloudflare CDN is working?
Check the HTTP response headers of your website; look for headers like `cf-cache-status`, which indicates if Cloudflare is caching content. Additionally, you can use online tools to test your site’s speed and confirm reduced loading times.
Does Cloudflare have a CDN? Do I need to change my DNS settings to use Cloudflare?
Yes, Cloudflare provides a CDN. To use it, you must change your DNS settings to point to Cloudflare’s nameservers, allowing them to route traffic through their network.
Can I use Cloudflare CDN with a custom SSL certificate?
Yes, Cloudflare supports custom SSL certificates; however, this feature is only available on paid plans. You can upload your certificate to Cloudflare and configure your settings to use it, ensuring secure connections for your visitors.
How do I clear the cache in Cloudflare CDN?
To clear the cache, log into your Cloudflare account, select your website, go to the Caching tab, and choose “Purge Everything” or purge specific files. This ensures that visitors receive the latest content.
