having a website is essential for individuals and businesses alike. Whether you’re looking to build a personal blog, an e-commerce platform, or an online portfolio, a well-constructed website can help you reach a global audience and achieve your goals. But if you’re new to website creation, you might be asking yourself: Do I need to know how to code? How do I get started? This guide is designed to answer these questions and walk you through the process of building your own website.
Whether you’re a complete beginner or someone with technical experience, this article will provide practical, user-friendly advice on how to create a website. We’ll cover everything from choosing a web hosting service to using CPanel and share valuable tips to ensure your site is successful.
Do I have to know coding to create a website?
No, you do not have to know coding to create a website. Today’s website builders, such as Wix, Squarespace, and WordPress, offer user-friendly interfaces that allow you to design and publish a site without any coding knowledge. These platforms provide drag-and-drop functionality, pre-designed templates, and customizable options, making it accessible for anyone to create a professional-looking website. Additionally, many website builders offer extensive tutorials and customer support, further simplifying the process for beginners.

However, having some basic knowledge of HTML, CSS, or JavaScript can be beneficial. Understanding these coding languages allows for greater customization and troubleshooting if you encounter issues. While it’s not necessary to be a coding expert, familiarity with the basics can enhance your ability to create a unique and functional website. Ultimately, the tools available today empower you to build a website tailored to your needs, regardless of your coding skills.
How to create a website
Creating a website from scratch can be an exciting yet daunting task, especially for those new to the digital landscape. However, breaking the process down into manageable steps can simplify the journey. A well-planned website serves various purposes, such as showcasing your portfolio, promoting a business, or sharing personal insights. Each step is crucial, from defining your website’s type to maintaining and promoting it post-launch. Let’s delve into the details of each stage to help you build a successful online presence.

Step 1: Define What Type of Website You Want to Make
Before diving into the technical aspects, it’s essential to clarify the purpose of your website. Are you creating a blog, an e-commerce store, a portfolio, or a business website? Understanding your website’s objective will guide your decisions throughout the building process. For instance, a blog may prioritize content creation and SEO, while an e-commerce site will need robust product pages and secure payment options. Additionally, consider your target audience and what they expect from your site. This foundational step ensures that your website effectively meets your goals.

Step 2: Choose Your Website Builder
In this step, it’s essential to select a website builder that aligns with your needs and technical skills. Popular options include:

- Wix: User-friendly with drag-and-drop capabilities, suitable for beginners. Note: Wix sites must be hosted on Wix servers.
- WordPress: Highly customizable and flexible, ideal for blogs and websites needing extensive features.
- Squarespace: Known for elegant designs and ease of use, perfect for creatives and small businesses.
- Shopify: A go-to for e-commerce, with integrated payment and inventory solutions. Note: Shopify sites must be hosted on Shopify’s servers.
Evaluate each platform based on your website’s needs, design preferences, and your technical expertise.
Step 3: Pick and Register a Domain Name
Your domain name is your website’s online identity, making it a crucial step in the process. Choose a name that reflects your brand, is easy to remember, and preferably includes relevant keywords for SEO purposes. Once you have a name in mind, register it through a domain registrar like GoDaddy, Namecheap, or directly through your website builder if they offer domain registration. Ensure the name is unique and check for any trademark conflicts to avoid future legal issues.

Step 4: Choose a Web Hosting Plan
Web hosting stores your website’s files, making it accessible online. Depending on your website builder, hosting may be included or require a separate plan. For instance, Wix and Shopify include hosting on their servers, so you won’t need an external plan. Other builders, like WordPress, may require independent hosting. Here are common hosting types:

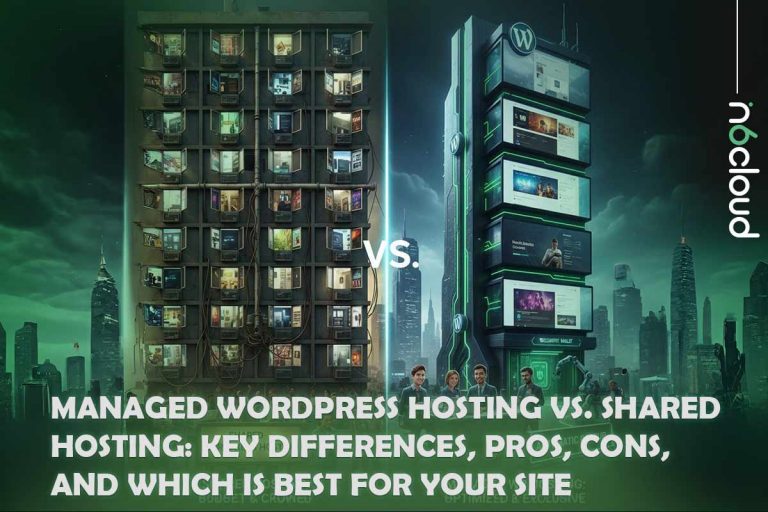
- Shared Hosting: Cost-effective, suitable for small websites with low traffic.
- VPS Hosting: Offers more resources and control, ideal for growing sites.
- Dedicated Hosting: Provides a dedicated server, best for large, high-traffic websites.
- Managed WordPress Hosting: Optimized for WordPress, includes automatic updates and backups.
Choose a plan that suits your budget and traffic expectations, considering factors like uptime, support, and scalability.
Step 5: Pick Your Template
Most website builders provide a range of templates to kickstart your design process. Choose a template that aligns with your brand’s aesthetic and purpose. Ensure it is responsive, meaning it functions well on both desktop and mobile devices. A well-designed template enhances user experience and engagement, making it easier for visitors to navigate your site.

Step 6: Customize Your Template to Your Brand
Once you’ve selected a template, customize it to reflect your brand identity. This includes adjusting colors, fonts, and layout. Incorporate your logo and any unique visual elements that distinguish your brand. Additionally, ensure consistency across all pages to create a cohesive look and feel. Customizing your template effectively helps establish brand recognition and trust among visitors.
Step 7: Build Your Site Structure
A clear site structure is vital for user experience and SEO. Organize your website into logical sections, including navigation menus that make it easy for visitors to find information. Common pages include:
– Home
– About
– Services or Products
– Blog
– Contact
Consider implementing a breadcrumb trail to enhance navigation and help users understand their location on your site.
Step 8: Add Useful Pages
As you build your website, focus on adding pages that provide value to your visitors. Essential pages might include:

– About Page: Share your story, mission, and team to build a connection with your audience.
– Contact Page: Make it easy for visitors to reach out with a contact form and relevant details.
– Blog: Regularly updated content can boost SEO and engage users.
– FAQ Page: Address common queries to assist users and reduce support requests.
Each page should have a clear purpose and contribute to the overall user experience.
Step 9: Create Engaging Content
Content is king when it comes to attracting and retaining visitors. Ensure your website features high-quality, relevant content that resonates with your audience. This includes:
– Blog posts that provide valuable insights and information.
– Product descriptions that highlight features and benefits.
– Visual content, such as images and videos, to enhance engagement.
Incorporate keywords naturally to optimize for search engines, but prioritize clarity and readability for your audience.
Step 10: Test and Publish
Before launching your website, thoroughly test all elements. Check for broken links, ensure forms function correctly, and verify that your site displays properly on various devices and browsers. Testing helps identify issues that could deter visitors and negatively impact your site’s performance. Once you’re satisfied with the results, hit the publish button to make your site live.
Step 11: Maintain and Promote Your Website
After launching, ongoing maintenance is crucial. Regularly update content, monitor website performance, and back up data to ensure security. Additionally, promote your website through various channels, such as social media, email marketing, and SEO strategies, to attract visitors and enhance visibility. Engaging with your audience and gathering feedback will also help refine your website over time.

By following these steps, you’ll be well-equipped to create a website from scratch that effectively meets your goals and engages your audience.
8 Essential Tips for Creating a Website
A successful website should provide a simple and engaging user experience with a user-friendly design and fast loading speeds. Utilizing tools like Google Analytics to enhance performance and adhering to accessibility standards helps attract a broader audience. Additionally, using high-quality visuals and optimizing the site for search engines can significantly impact user engagement and overall success. In the following sections, we will explore these aspects in more detail.

1. Focus on User Experience (UX)
Beyond aesthetics, prioritize how users interact with your site. Make navigation simple, ensure fast load times, and reduce clutter to improve usability. A clean, easy-to-navigate site will keep visitors engaged.
2. Integrate Analytics Early On
From the start, implement tools like Google Analytics to track visitor behavior. Understanding how users interact with your website helps you make informed adjustments and optimize your site for better performance over time.
3. Ensure Accessibility for All Users
Web accessibility is critical for reaching a broader audience. Make sure your website adheres to accessibility standards, such as using alt text for images, clear headings, and keyboard navigation to accommodate users with disabilities.
4. Implement SEO Best Practices
While building your website, keep search engine optimization (SEO) in mind. Use optimized meta tags, create SEO-friendly URLs, and make sure your content includes relevant keywords to rank higher on search engines.
5. Utilize High-Quality Visuals
Visual content can significantly enhance user engagement. Invest in high-quality images, videos, and graphics that resonate with your brand. Poor-quality visuals can negatively impact your brand perception, so quality matters.
6. Incorporate Social Proof
Add elements of social proof like customer testimonials, case studies, or reviews to establish credibility. This helps build trust with visitors and can improve conversions, particularly on service or product-based websites.
7. Optimize for Speed
A slow-loading website can frustrate users and harm your SEO ranking. Use image compression, caching, and a content delivery network (CDN) to improve your site’s speed. Speed optimization should be a key part of your build process.
8. Regularly Update and Back Up Your Site
After launching, your work isn’t over. Regularly update your content, software, and plugins to maintain security and functionality. Additionally, schedule frequent backups to prevent data loss in case of an emergency.
By applying these advanced tips, you can create a website that not only meets industry standards but also stands out in terms of usability, performance, and design.
How to Use CPanel to Create a Website
Creating a website using cPanel can be an efficient and streamlined process. cPanel is a popular web hosting control panel that provides an intuitive interface for managing various aspects of your web hosting account, including creating websites. Below is a step-by-step guide on how to use cPanel to create a website:

Step 1: Log in to cPanel
First, access your cPanel by logging into your web hosting account. If you don’t have the cPanel address, you can contact your hosting provider’s support team for assistance.
Step 2: Locate the Website Creation Tools
Once inside the cPanel dashboard, look for the section labeled “Software” or “Website”. Here, you’ll find various tools for creating websites. The most common options include:
SiteJet: A basic website builder for creating simple, one-page websites with ease.
WordPress Toolkit and CMS Installers: Tools like Softaculous and WordPress Toolkit, allowing you to install popular CMS platforms such as WordPress, Joomla, or Drupal with just a few clicks.
Step 3: Install a Content Management System (CMS)
If you want a more robust website, installing a CMS like WordPress is a great option. Here’s how to install WordPress using cPanel:
1. Go to Softaculous or WordPress Toolkit: Under the “Software” section, click on the Softaculous or WordPress Toolkit icon.
2. Select WordPress: In the installer interface, locate and click on the WordPress icon.
3. Click Install Now: You’ll be redirected to a setup page. Click “Install Now” to begin the installation.
4. Fill in the Details:
– Choose a Domain: Select the domain on which you want to install WordPress.
– In Directory: Leave this field blank to install WordPress on the root domain, or specify a subdirectory if desired.
– Site Name and Description: Enter your website’s name and a short description.
– Admin Username and Password: Set up credentials for accessing your WordPress dashboard.
5. Click Install: Once you’ve filled out the necessary information, click Install. The process usually takes a few seconds, and you can then access your new WordPress site by visiting `yourdomain.com/wp-admin`.
Step 4: Create Email Accounts
For a professional look, you may want to set up custom email addresses for your domain (e.g., [email protected]). Here’s how to create an email account in cPanel:
1. Go to the Email section and click on Email Accounts.
2. Click Create and fill out the required fields, such as the email address and password.
3. Click Create to finish setting up your email account.
Step 5: Upload Your Website Files (Optional)
If you’ve already designed your website and have files ready, you can upload them to cPanel using the File Manager or FTP (File Transfer Protocol):
– Using File Manager: Navigate to File Manager in cPanel, go to the public_html folder (this is where your website files should be stored), and click Upload to add your files.
– Using FTP: Use an FTP client like FileZilla to upload your files. You’ll need to configure the FTP client with your cPanel credentials and the server details, which can be found in the **FTP Accounts section.
Step 6: Set Up Databases (If Needed)
Some websites, particularly dynamic ones like those built with WordPress, Joomla, or other CMSs, require a database. If you’re manually setting up a site or need a database:
1. Go to MySQL Databases under the Databases section in cPanel.
2. Create a new database and then add a new user.
3. Assign the user to the database with All Privileges.
Step 7: Secure Your Website with SSL
Having an SSL certificate is crucial for website security and SEO. In cPanel, you can install SSL via Let’s Encrypt (if your host provides it):
1. Go to the SSL/TLS section.
2. Select Manage SSL Sites.
3. Choose your domain and click Install SSL.
Many hosting providers include SSL for free, but if your hosting doesn’t, you may need to purchase one and follow the same process.
Step 8: Create Backups
Backing up your website is crucial to ensure you don’t lose data. In cPanel, you can create a full website backup by following these steps:
- Navigate to the Backup section.
- Click on Download a Full Account Backup.
- Choose the location to save the backup and click Generate Backup.
with N6 Cloud, backups are created automatically, so your data is regularly saved without manual intervention.
Step 9: Test and Publish Your Website
Once your CMS is installed, files are uploaded, and databases are configured, it’s time to test your site. Visit your domain in a browser to ensure everything is working properly. Check for broken links, design flaws, and functionality. After testing, your site is ready to go live.
Step 10: Maintain Your Website Through cPanel
After publishing, regular maintenance is essential for a smooth-running website. Use cPanel for tasks like:
– Updating software and plugins (via your CMS or manually in File Manager).
– Monitoring bandwidth and disk space usage in the Metrics section.
– Scheduling automatic backups in the Backup Wizard.
– Managing email accounts, databases, and security settings.
In conclusion
building a website has become an essential step for individuals and businesses looking to expand their online presence. Whether it’s for personal use or professional growth, a well-designed website can help you reach a global audience, showcase your services, and engage with potential customers. With the availability of easy-to-use tools and platforms, creating a website has never been more accessible, making it a smart investment for anyone looking to thrive in the digital age.


