Building a website has never been more accessible, and WordPress remains the world’s most popular platform for beginners who want full control without needing to learn programming. Whether you are creating a personal blog, launching a business website, showcasing a portfolio, or preparing to sell products online, WordPress offers the flexibility, power, and ease of use to bring your ideas to life.
Yet for most beginners, the first steps can feel overwhelming. You need to choose a domain name, select the right hosting service, install WordPress, pick a theme, design your pages, add functionality, and make sure everything is secure and optimized before launching. The good news is that with the right guidance and the right hosting environment, the process becomes simple and even enjoyable.
This step-by-step guide is designed to help complete beginners build a WordPress website from the ground up in 2025. You will learn how to plan your site, install WordPress, choose themes, use beginner-friendly tools like Elementor, install essential plugins, optimize performance, and go live with confidence.
By the end, you will have a fully functional WordPress website and a clear understanding of how to maintain it long term. Let’s begin with the essential planning steps that set the foundation for a successful site.
Planning and Foundation: The Essential First Steps
Before installing anything or choosing a theme, it’s helpful to lay a clear foundation for your website. These early decisions shape how your site looks, how it functions, and how easily it can grow later. For beginners, this stage often gets skipped, but spending a little time planning now will make the rest of the process far smoother.
Defining Your Website Goal
Every successful website starts with a purpose. Defining your goal gives structure to your content, design, and long-term strategy. Ask yourself what role your site will play. Are you creating a personal blog? Launching a business website to represent your services? Building an online portfolio to attract clients? Preparing an online store or a booking-based business?
When your main goal is clear, it becomes much easier to choose the right theme, tools, and hosting plan later in the setup. For example, a photographer may need a minimal, image-focused design, while a service-based business may prioritize clear contact options, service pages, and a professional homepage layout.
Choosing a Domain Name
Your domain name is your online identity. It is how visitors find you, remember you, and talk about your website. A strong domain name should be easy to spell and pronounce, and closely aligned with your brand or purpose. Beginners often choose overly long or complicated domains, but simple ones are always more effective.
When possible, choose a .com domain, as it is the most widely recognized extension; regional extensions like .ca or industry-specific ones like .store or .tech can also work well. Before registering your domain, make sure it does not conflict with an existing trademark or an active business name. This prevents legal complications and helps maintain a unique online presence.
Your domain registrar will allow you to purchase and manage your domain. Once registered, you will connect it with your hosting plan during the setup process.
Selecting the Best WordPress Hosting
Your hosting service is the backbone of your website. While there are many hosting types available, beginners often struggle to choose between shared hosting, VPS hosting, or managed solutions. For a new WordPress user, Managed WordPress Hosting is generally the smoothest, simplest, and most reliable choice.
Managed WordPress Hosting is designed specifically for WordPress websites and includes automatic updates, optimized performance, enhanced security settings, and simplified site management tools. This allows beginners to focus on building their website without worrying about technical maintenance.
If you are looking for a reliable option to start with, you can explore WordPress Hosting plans.
Managed hosting makes your WordPress installation easier, improves site speed, and gives you built-in tools designed for beginners. You will still have full control over your site, but you will not need to troubleshoot server-level issues or manually configure caching and performance features.
With your goals defined, your domain name chosen, and your hosting environment ready, you have everything you need to begin installing WordPress and building your website step by step.
Installation and Initial Configuration (Getting Started)
Once you have your hosting account and domain name ready, you can begin setting up WordPress. Modern WordPress hosting makes this process incredibly simple, often requiring only a single click. This section will guide you through installation, learning the dashboard, preparing your site, and securing your login information.
Installing WordPress (One-Click Setup)
Nearly all managed WordPress hosting providers include a one-click installer. Instead of uploading files manually or creating databases by hand, the installer handles everything behind the scenes. You log in to your hosting control panel, select “Install WordPress,” choose the domain you want to use, and the system completes the setup in seconds. This means beginners can get WordPress up and running without any technical steps or configuration.
Once the installation is complete, you can access your new website’s WordPress admin panel using the WordPress login URL. In most cases, typically something like yourdomain.com/wp-admin. You will log in using the admin username and password you created during setup. Saving these in a secure place is important, as you will use them regularly.
Familiarizing Yourself with the Dashboard

After logging into WordPress for the first time, you will see the dashboard. This is your website’s control center, where you create content, install themes, activate plugins, and manage all your site settings. The layout is simple and designed for beginners. A few of the most important sections include:
- Posts for blog entries
- Pages for important static content like Home, About, or Contact
- Appearance for themes, menus, and design customization
- Plugins for adding new features
- Settings for managing general site behaviour
Spending a few minutes clicking around the dashboard helps you become comfortable with the interface, which is the foundation of everything you build next.
Essential Post-Installation Cleanup (Preparation)
A fresh WordPress installation includes placeholder content, unused plugins, and default settings that should be cleaned up before designing your site. You will want to delete the sample “Hello World” post, remove any unnecessary themes or plugins, and make sure your permalink structure is set to “Post name” for clean URLs. These small tasks help create a clean starting point and prevent clutter later.
Many beginners forget this step, which can lead to confusion or unnecessary files in your installation. Cleaning up early ensures your site stays organized as it grows.
Configuring General WordPress Settings
Before you dive into design, make sure to configure your basic site settings. Under the “General” tab, you can set your site title, tagline, timezone, and language. In the “Reading” tab, you will choose whether your homepage displays a static page or your latest blog posts. These settings create the foundation for your content structure and help search engines understand your site.
It is also a good idea to update your site’s discussion settings to decide whether visitors can leave comments on blog posts. For many business websites, disabling comments altogether keeps the site clean and reduces spam.
Securing the Admin Login
Your WordPress admin area controls your entire site, so keeping it secure is essential. Always use a strong, unique password created during installation. Avoid relying on automatically generated passwords sent through email, as email is not a secure channel.
Using a password manager (such as Bitwarden, 1Password, or LastPass) allows you to store long, complex passwords safely and access them when needed. Enabling two-factor authentication adds another layer of protection, ensuring that even if someone obtains your password, they still cannot access your admin account without the additional verification step.
Design, Theme, and Content Structure
Designing your website is where the process becomes visual and creative. WordPress gives you complete control over how your site looks and functions, even if you have no design or coding background. In this section, you will choose a theme, use starter templates, begin working with a page builder like Elementor, and create the essential pages that form the structure of your website.
Choosing and Installing Your Theme
Your theme determines the overall appearance and layout of your website. WordPress includes thousands of themes you can browse directly from the dashboard under Appearance → Themes → Add New. You will find minimal designs, business templates, ecommerce layouts, portfolio themes, and blog-specific designs.
For beginners, a lightweight, flexible theme is ideal because it offers cleaner code and faster load times. Popular starter themes like Astra, GeneratePress, Blocksy, Kadence, or Neve provide professional designs without requiring advanced customization. They work beautifully with page builders and are mobile-compatible right out of the box.
Installing a theme takes only one click. After activation, you can begin customizing your colours, fonts, buttons, and layout using the WordPress Customizer or your chosen page builder.
Using Starter Templates for Quick Design
Starter templates are pre-built page designs explicitly created to help beginners launch their website quickly. Instead of building everything from scratch, you can import a professionally designed homepage, about page, services page, or full site kit with a single click.
Themes like Astra and Kadence include libraries of templates for different industries such as real estate, fitness, photography, restaurants, and online courses. You can import one that aligns with your vision, then replace the placeholder text and images with your own content. This gives you a polished design instantly and dramatically reduces setup time.
For beginners, starter templates are one of the fastest ways to create a great-looking site without hiring a designer.
Introduction to Page Builders (Elementor, No Coding Required)
For many beginners, the most intimidating part of building a website is the design process. WordPress itself gives you a solid foundation, but a page builder like Elementor makes the entire experience much easier, especially if you have never designed a website before. Instead of writing code or adjusting complex settings, Elementor lets you build everything visually. What you see on the screen is exactly what your visitors will see when the site goes live.
When you open a page in Elementor, your screen becomes a simple drag-and-drop workspace. The left side contains all the tools you need, and the right side shows your page exactly as it appears. You can click on any part of the page to edit it directly. If you want to change a title, you click on it and type. To add a photo, drag an image widget to the spot where you want it. If you want a button, a section, or a new block of text, you just pick it up from the sidebar and drop it onto your page.
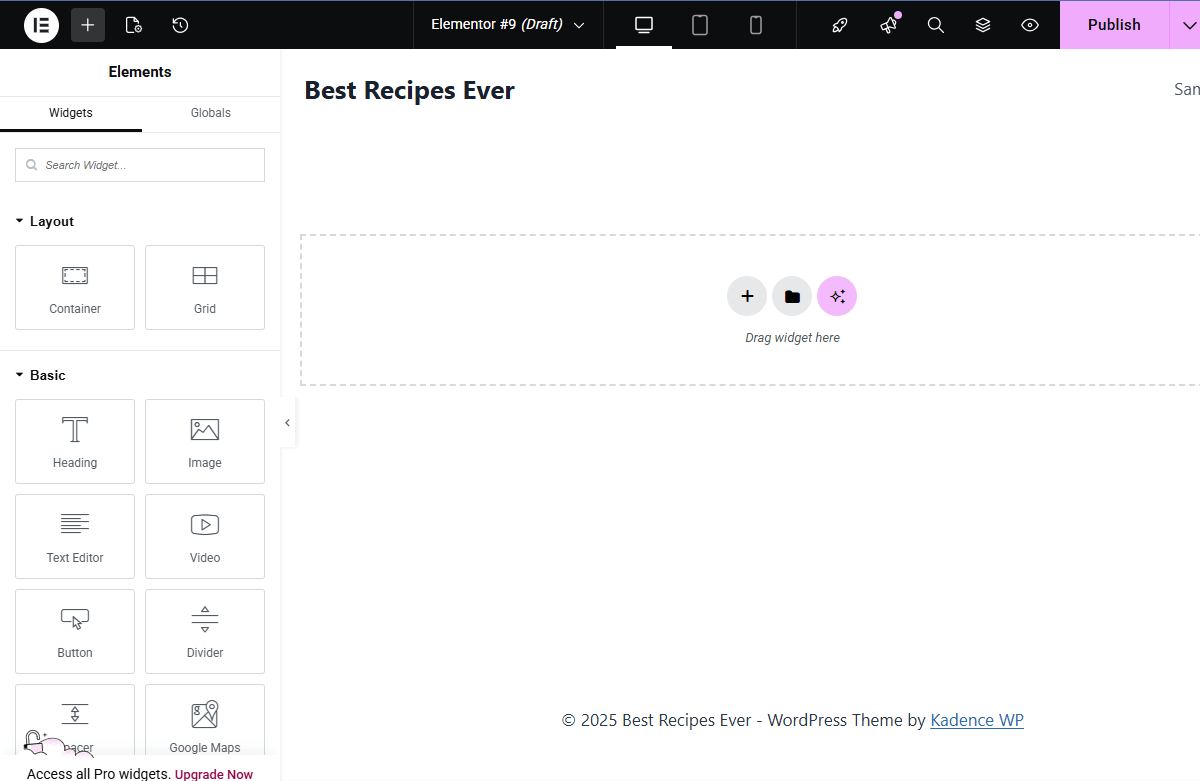
Elementor uses “containers,” which you can think of as empty blocks that help organize your layout. They behave like simple sections you can place anywhere on a page. Inside these containers, you add widgets, which are the actual content elements. Widgets include everything a beginner might need: titles, paragraphs, buttons, photos, videos, icons, contact forms, and more. You do not need to understand how these elements work technically. Elementor takes care of all the complicated parts so you can focus on choosing what looks and feels right.
What makes Elementor so helpful for beginners is how easy it is to customize everything. When you select any item, a panel opens that lets you adjust colours, fonts, sizes, spacing, and alignment. You do not need to know design rules or coding tricks. You move sliders, pick colours, and try out different styles until your website matches your vision. If you make a mistake, you can undo it instantly. If you want to try a different look, you can experiment freely without breaking anything.
Even better, Elementor comes with ready-made templates. Instead of starting with a blank page, you can load a professionally designed layout for homepages, service pages, portfolios, or about pages. You can then replace the sample text and images with your own content. This gives beginners a huge head start and often results in a cleaner, more polished design than building from scratch.
At its core, Elementor is a tool that empowers anyone, even complete beginners, to create beautiful, modern pages without needing technical skills. It transforms website building into a creative, hands-on experience where you can visually build each section of your site at your own pace and with complete freedom.
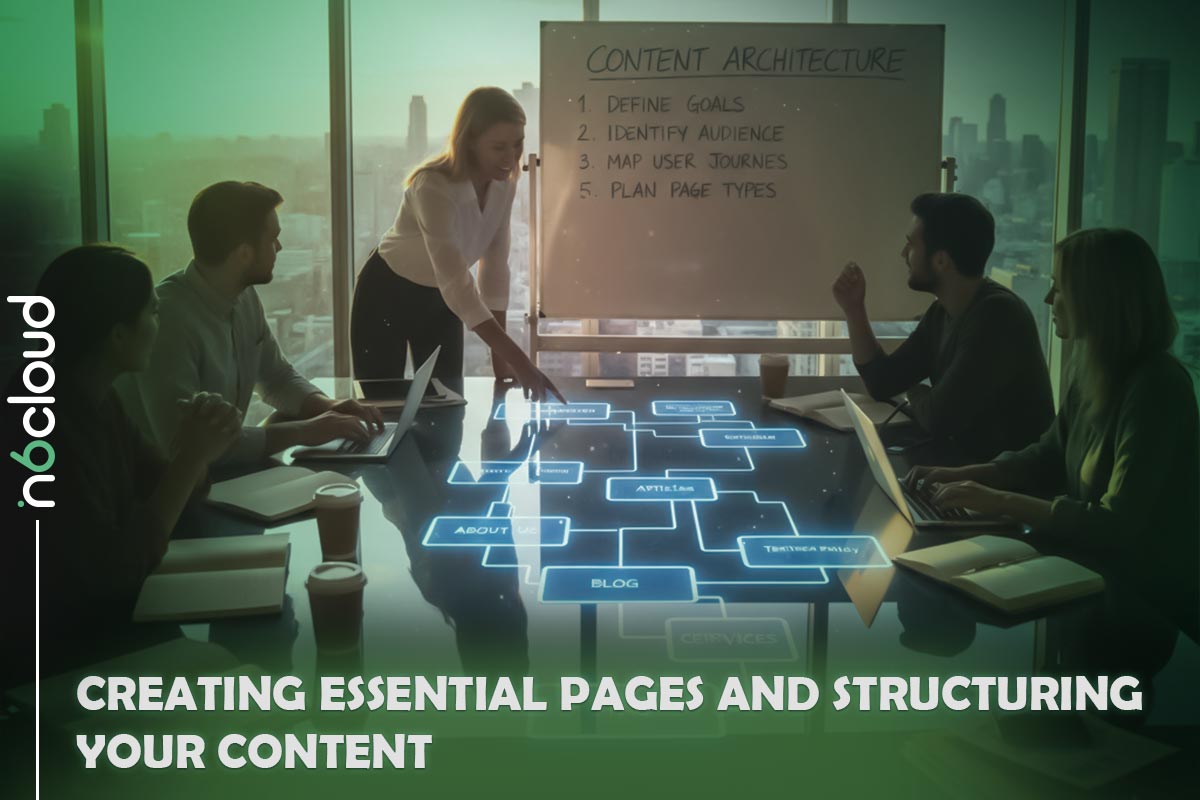
Creating Essential Pages and Structuring Your Content
Most websites start with a few important pages:
- Homepage
- About page
- Services or Products page
- Blog section
- Contact page
Using Elementor, you can build these pages at your own pace. Begin with the homepage and focus on guiding visitors smoothly from section to section. For example, start with a strong introduction banner, followed by a short description of who you are, then showcase your services or latest posts.
Your About page can include your story, team, or mission. Your Services page can highlight your offerings using icons and short descriptions. Your Contact page can include an Elementor form widget, making it easy for visitors to reach you.
The key is not to rush. Build each page slowly and preview your work often. Elementor’s visual editor helps you understand how your website grows step by step.
Setting Up the Homepage
WordPress allows you to choose what your homepage displays. Many beginners prefer to show a custom-designed Elementor page rather than a list of recent blog posts. To do this, simply:
- Create your homepage with Elementor
- Publish it
- Go to Settings → Reading in WordPress
- Choose “A static page” and select your new homepage
Now, your custom design will appear when visitors land on your domain.
Customizing Your Website’s Appearance
Even though Elementor handles the page layout, your theme still controls a few global details, such as fonts, overall colours, and how your header and footer look. Most modern themes include a visual customization panel that lets you adjust these settings without touching code.
You can set:
- global colors
- global typography
- header layout
- footer layout
Keeping these elements simple makes your website feel clean and professional, and Elementor ensures your page designs match the overall style.
Setting Up Navigation Menus
Your navigation menu helps users move around your website. WordPress makes this easy to configure. You can add pages, reorder them, or rename menu items without any technical knowledge.
Once your menu is ready, your theme will display it automatically at the top of your site. With Elementor Pro, you can even design custom headers and footers visually, but beginners can start with the built-in theme header and focus on designing content first.
Functionality, Optimization, and Launch
Once your website starts to look the way you want, the next step is to make sure it works smoothly, loads quickly, and stays protected. This part of the process focuses on adding the right features, improving performance, and preparing your site for launch. You don’t need deep technical knowledge to handle any of this. WordPress makes everything approachable, and Elementor keeps the design side simple.
Installing Must-Have Plugins to Extend Your Website
Plugins are like apps for your WordPress site. They add new features without requiring coding. A few essential plugins help almost every beginner:
- A caching plugin to improve speed
- An SEO plugin to guide your content and help Google understand your pages
- A security plugin for basic malware scanning and login protection
- A backup plugin to ensure you never lose your work
- A forms plugin if your theme or Elementor version does not include one
Each of these plugins solves real problems. Caching plugins help browsers load your pages faster by storing copies of your content. SEO plugins help you write better titles and descriptions. Security tools add a layer of protection around your site. You don’t need many plugins; only choose what your site truly needs. Installing too many can slow your site down, so keep things light and purposeful.
Boosting Site Speed and Performance
Visitors expect fast-loading websites, and search engines reward them. The good news is that you can significantly boost your site’s performance with a few simple actions:
- Choose optimized images
Uploading large, uncompressed images is one of the biggest beginner mistakes. Before uploading, resize them to the dimensions you actually need. WordPress and Elementor handle images well when they are appropriately optimized. - Use a caching plugin
Caching helps your site load noticeably faster. Most plugins work out of the box, so you don’t need to configure advanced settings. - Add a CDN (Content Delivery Network)
A CDN is one of the easiest ways to improve global speed. Instead of loading everything from one server, a CDN stores copies of your images and static files on servers around the world. When someone visits your website, they receive the files from the nearest location, which can make pages feel significantly faster, especially for international visitors. Many hosting providers offer built-in CDN options, and WordPress CDN services are simple to activate. - Select a reliable hosting provider
A stable hosting environment has a massive impact on speed. Whether you choose shared hosting or a managed WordPress hosting plan, picking a provider known for fast servers gives you an immediate advantage.
When combined, these small improvements help your pages feel responsive and smooth, giving your visitors a better experience from the moment they arrive.
Backing Up Your Website to Protect Your Work
Nothing is more frustrating than losing your work due to an update gone wrong or a plugin conflict. Backups are your safety net. Once enabled, they regularly save copies of your entire site so you can restore everything with one click if anything unexpected happens.
Many hosting providers already include automated backups, so check your hosting dashboard before installing any backup plugins. If yours does not, you can easily add a dedicated backup tool that saves your files and database on a schedule. This simple step offers peace of mind and protects all the time you’ve invested in building your site.
Running a Pre-Launch Checklist
Before you publish your site and make it available to the world, it’s helpful to walk through a few final checks:
- Visit your website on a mobile device to make sure everything looks correct
- Click through your menus and links to ensure they lead to the right pages
- Check for spelling or formatting errors
- Test your contact form to confirm you receive messages
- Preview several pages to ensure design consistency
This final review only takes a few minutes but helps you catch details that matter once real visitors start browsing your site.
Next Steps After Launch: Maintenance and Growth
Launching your website is exciting, but the journey doesn’t end there. A successful site grows and evolves. WordPress makes ongoing maintenance simple:
- Update your plugins, theme, and WordPress version regularly
- Keep improving your content and adding new pages
- Monitor your site’s performance from time to time
- Consider adding advanced features later, such as email marketing integrations or eCommerce tools
As your confidence grows, you can explore more advanced customization. Elementor makes it easy to refine layouts, add new sections, or redesign pages without needing a developer. The more you work with it, the more natural the process feels.