Securing a WordPress site with SSL is no longer optional. Browsers label any page served over plain HTTP as “Not Secure”, visitors look for the padlock before they log in or pay, and search engines expect encrypted connections by default. An SSL certificate is what turns that warning into a padlock and moves your address from HTTP to HTTPS. Getting it installed and then switching WordPress over to HTTPS everywhere is one of the most valuable improvements you can make to your site this year.
This guide is written for WordPress owners. It explains how to get SSL for WordPress in 2026 using both free and paid options, then focuses on the practical part that most articles rush through: the methods for enabling HTTPS within WordPress itself. You will learn how to activate a certificate through your host, point WordPress to HTTPS, enforce a proper 301 redirect, clear mixed-content errors, and fix errors that appear during a migration from HTTP to HTTPS. Self-managed servers and CDN setups are covered too, in short sections at the end for those who need them.
Understanding SSL and TLS in WordPress
SSL stands for Secure Sockets Layer, and it is the name most people still use out of habit. The protocol that actually protects your traffic today is TLS (Transport Layer Security), the modern successor to SSL. When a host or plugin refers to an “SSL certificate”, it means a TLS certificate; the two terms are used interchangeably. The outcome is what matters: data moving between your visitor’s browser and your WordPress server is encrypted so it cannot be read or altered in transit. The current trusted versions are TLS 1.2 and TLS 1.3, and your web server enables them automatically.
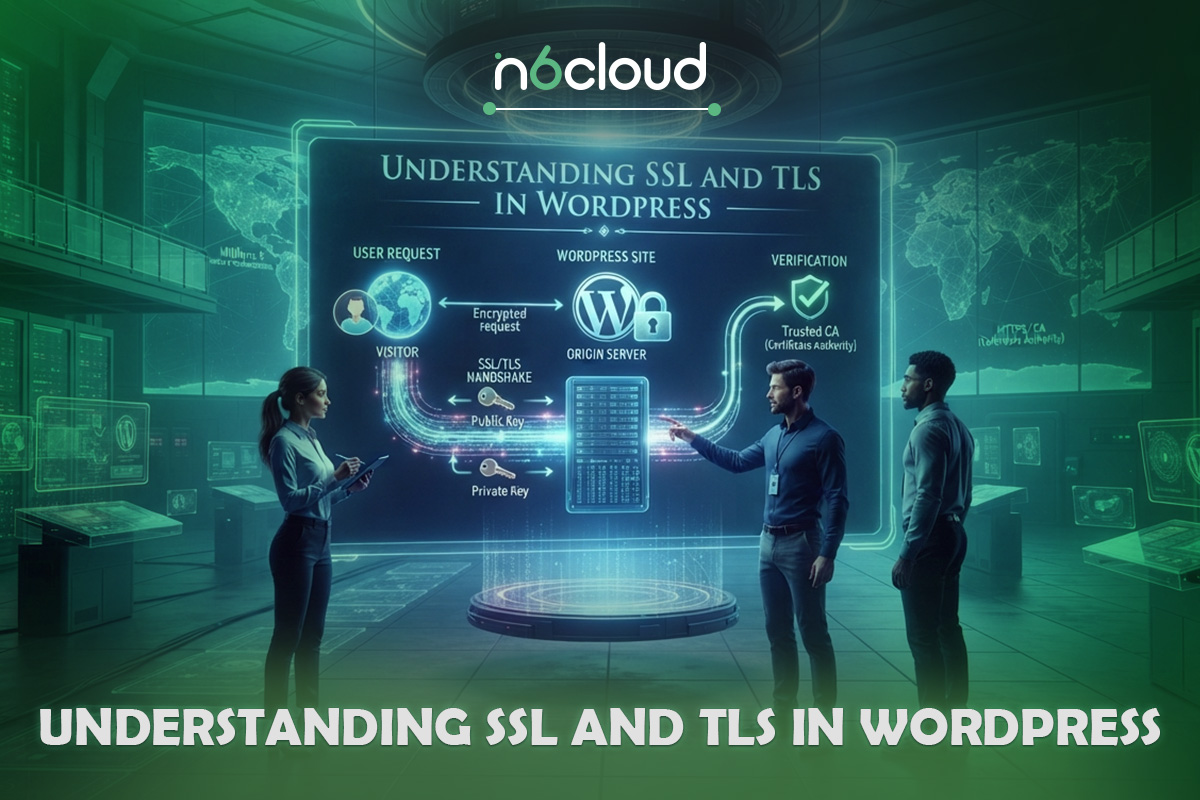
Before a single line of your page is delivered, the browser and server complete a brief negotiation called the TLS handshake. The browser lists the protocols it supports, the server presents its certificate, and the browser checks that certificate against a trusted certificate authority (CA). Once both sides agree on a shared session key, everything that follows is encrypted, and the padlock appears. On a well-configured host, this completes in a fraction of a second.
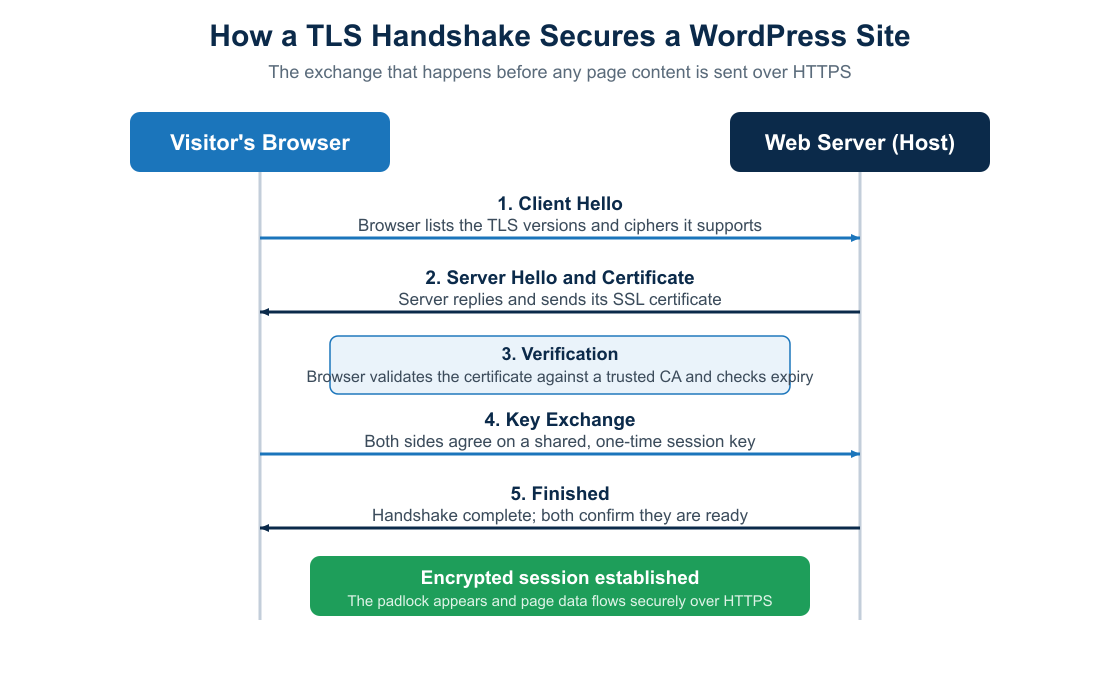 Figure 1. The TLS handshake that secures every HTTPS request to a WordPress site.
Why HTTPS matters for your WordPress site
There are three reasons to prioritize HTTPS. First, trust: the “Not Secure” label quietly costs conversions, and the padlock reassures visitors at exactly the moment they decide whether to submit a form or make a purchase. Second, SEO: Google confirmed HTTPS as a ranking signal in 2014, and it remains one in 2026. Just as important, HTTPS is a prerequisite for modern transport protocols that speed up loading. Third, performance and Core Web Vitals: TLS 1.3, session resumption, and HTTP/2 or HTTP/3 (all of which require HTTPS) enable the browser to load resources more efficiently, which supports Largest Contentful Paint and the other vitals. A correct HTTPS setup is the foundation that lets the rest of your work count, not a trick that lifts rankings on its own.
Choosing the Right Certificate (Free, Paid, or CDN)
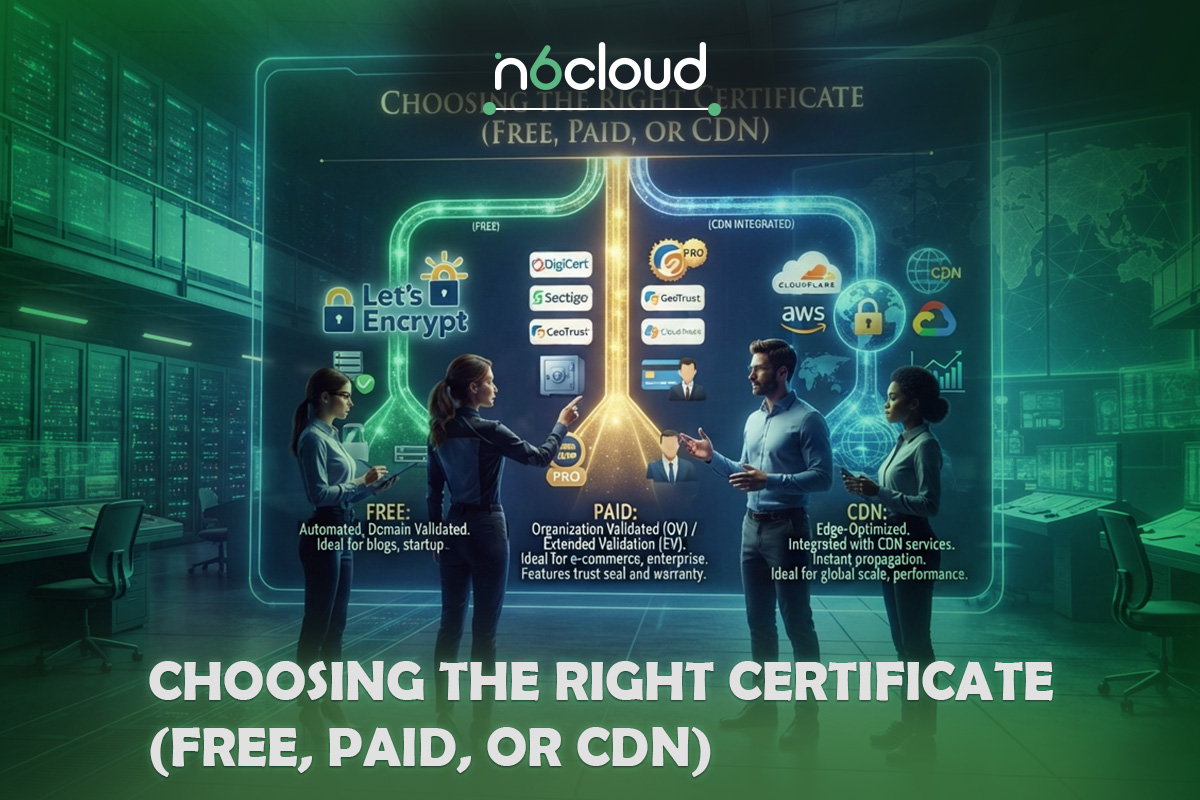
Before you enable HTTPS, decide which certificate suits your site. There are three practical routes, and the right one depends on what your WordPress site does.
Free SSL with Let’s Encrypt
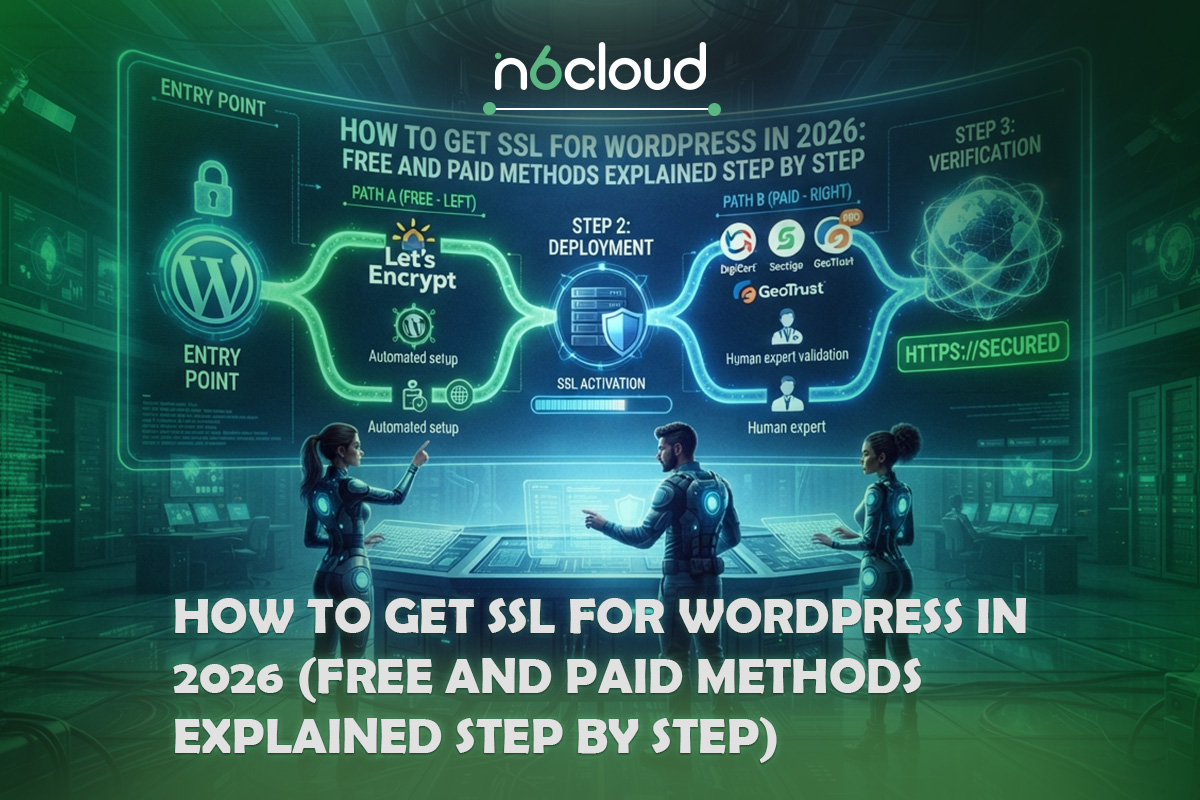
Let’s Encrypt is the certificate authority behind most free SSL certificates. It issues domain-validated certificates at no cost through an automated protocol called ACME, which is why free HTTPS is built into so many hosting panels. The limits are worth knowing: it offers only domain validation, with no organization vetting or warranty, and its certificates are short-lived. Terms have been 90 days, and the authority is now moving to even shorter lifetimes, with 45-day and 6-day options rolling out through 2026, making automated renewal essential. For blogs, brochure sites, and many small business pages, free SSL is a fine choice.
Paid SSL (DV, OV, and EV)
Paid certificates differ in how thoroughly the authority confirms who runs the site, and they add a warranty and human support. Domain Validated (DV) certificates confirm control of the domain and issue in minutes. Organization Validated (OV) certificates also verify your business details. Extended Validation (EV) certificates undergo the most rigorous vetting and are well-suited to finance and enterprise sites. If you want to buy SSL certificate coverage with a clear warranty and expert installation, N6 Cloud offers all three tiers with 256-bit encryption and a trusted site seal.
How to Enable HTTPS in WordPress: Step by Step
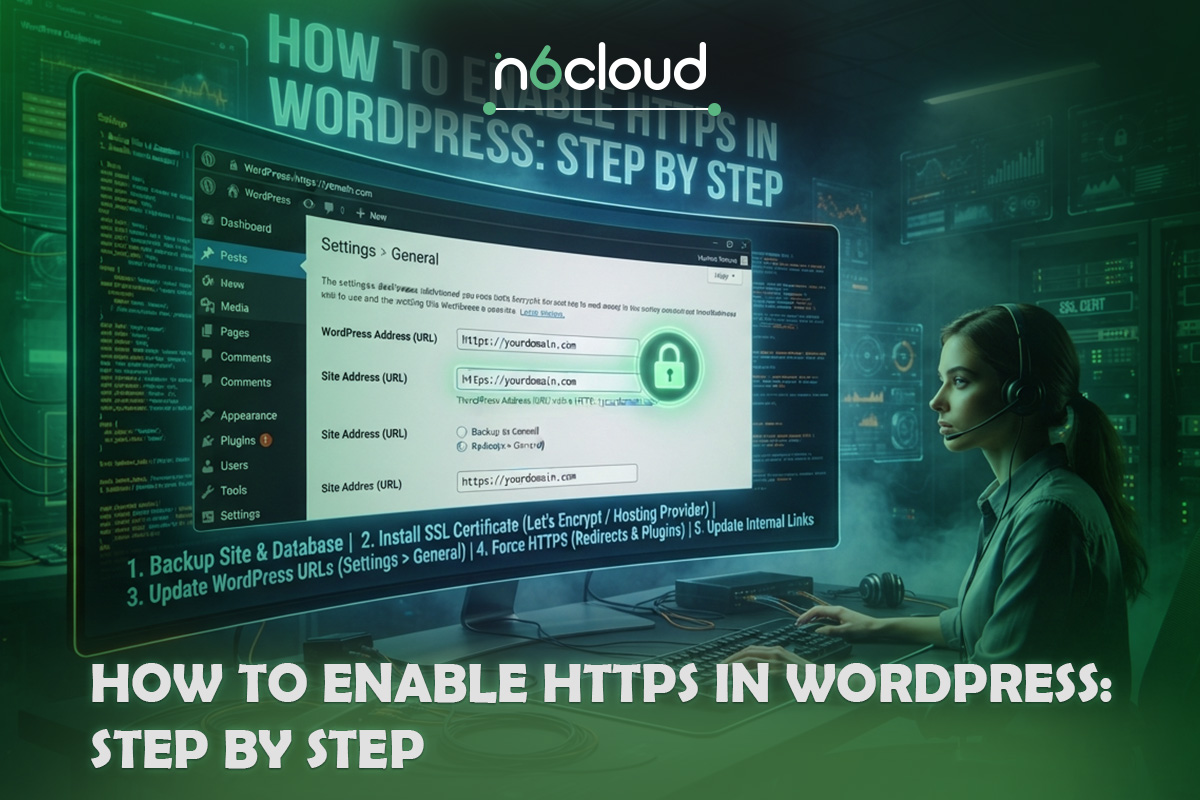
This is the heart of securing a WordPress site. Enabling HTTPS is a sequence: get a certificate installed on the server, tell WordPress to use HTTPS, force every request to use the secure address, and clean up the old HTTP links left in your content. Work through the four steps in order, and your WordPress SSL setup will be complete and correct.
Step 1: Get an SSL certificate from your host
For most WordPress owners, this is the simplest and safest path. On a cPanel host, a feature called AutoSSL automatically issues and renews a free domain-validated certificate for every domain on the account, so HTTPS is often live with no manual work. DirectAdmin offers the same through its Let’s Encrypt integration. If you would rather not touch a server at all, a plan that includes automated SSL is the most reliable route. You can buy web hosting from N6 Cloud with SSL, free migration, and Canadian data centres included.
If you have purchased a commercial DV, OV, or EV certificate rather than using a free one, the flow through your control panel adds a few steps:
- Generate a CSR and private key in the SSL/TLS Manager, keeping the private key on the server.
- Complete validation with the certificate authority: an email or DNS check for DV, business verification for OV and EV.
- Install the certificate and CA bundle so browsers can verify the complete chain, or let the N6 Cloud team generate, validate, and auto-install it for you.
Step 2: Point WordPress to HTTPS
With a certificate on the server, tell WordPress to build its links securely. In the dashboard, go to Settings, then General, and change both the WordPress Address (URL) and the Site Address (URL) from http to https. Save, and WordPress will log you out so you can sign back in over the secure address. This single change updates the core site URLs, but it does not yet redirect visitors or fix links buried in older content, which is what the next two steps handle.
Step 3: Force HTTPS with a 301 redirect
Until every HTTP request is redirected to HTTPS, search engines can index two versions of each page, and some visitors will still land on the insecure one. A permanent 301 redirect fixes this and passes ranking value to the secure URL. There are two reliable ways to do it in WordPress. The plugin route is easiest: a trusted plugin such as Really Simple SSL detects your certificate, forces HTTPS site-wide, and resolves most mixed content automatically, which is ideal if you prefer not to edit server files. The manual route adds a redirect rule to the .htaccess file in Apache, or the equivalent server block in Nginx, so the redirect occurs at the server level before WordPress even loads. Whichever you choose, use only one method, because stacking several redirect sources is a common cause of redirect loops.
Step 4: Fix internal links and database URLs
Older WordPress content often stores absolute HTTP URLs for images, links, and embedded files directly in the database, and these URLs do not update automatically. Left alone, they trigger mixed-content warnings that remove the padlock. The fix is a careful search-and-replace across the database that rewrites HTTP URLs to HTTPS, using a tool such as the Better Search Replace plugin or the WP-CLI search-replace command. Always take a full backup first. After running it, update any hard-coded links in menus, widgets, and theme templates, then reload key pages to confirm the padlock holds. At this point, your WordPress site is fully served over HTTPS.
Advanced setups: self-managed servers and CDNs
If you run WordPress on an unmanaged VPS or dedicated server, you install and renew the certificate yourself. The standard free route uses Certbot, the official Let’s Encrypt client: connect over SSH, install Certbot with the plugin for your web server, and run it to obtain the certificate and configure Apache or Nginx, including the full chain file and an automatic renewal timer. If you serve WordPress through Cloudflare, install a valid certificate on the origin and set the SSL mode to Full (strict), as covered above, then confirm the DNS records for your site are proxied through the network. These setups reach a smaller group of users, but the same four steps in WordPress still apply once the certificate is in place.
Fixing Common SSL Issues in WordPress
Most post-migration warnings stem from a handful of predictable causes, each with a quick fix. Mixed content is the most common: a page loads over HTTPS but still calls an image, script, or stylesheet over HTTP, so the browser flags it and the padlock disappears. The database search-and-replace in Step 4 clears most of it, and a Content Security Policy that upgrades insecure requests catches any stragglers.
Redirect loops, shown as ERR_TOO_MANY_REDIRECTS, usually mean two systems are each forcing the protocol, typically with Cloudflare set to Flexible while WordPress also forces HTTPS. Set Cloudflare to Full (strict) and ensure only one place issues the redirect.
An expired certificate produces a hard security warning and is prevented by reliable automated renewal, which matters more as certificate lifetimes shorten. An incomplete certificate chain, where the intermediate certificate is missing, fails on some devices but works on others and is resolved by serving the full chain file.
Three tools cover almost every diagnosis. The Qualys SSL Labs server test grades your configuration from A+ downward and flags weak protocols and chain problems, making it the fastest way to validate a new install. Chrome DevTools shows mixed content warnings in the Console and certificate details in the Security panel, so you can pinpoint the exact insecure resource. Screaming Frog crawls the whole site and lists insecure internal links, redirect chains, and pages still returning HTTP, which is invaluable when cleaning up a large site.
Advanced SSL Optimization for Speed and Security
Once HTTPS is stable, a few refinements turn a secure WordPress site into a fast and hardened one. Enable HTTP/2 and HTTP/3 at your host or CDN, since both require HTTPS and load resources far more efficiently. HTTP/3 runs over the QUIC protocol and performs better on mobile and congested networks, and major browsers support it by default in 2026. Turn on OCSP stapling so the server attaches the certificate’s revocation status to the handshake, removing a separate lookup from the visitor’s browser, and keep TLS session resumption enabled so returning visitors skip most of the handshake. Finally, add an HTTP Strict Transport Security (HSTS) header once HTTPS is fully working and every subdomain is covered, so browsers only ever connect over HTTPS. Introduce it with a modest max-age before committing to a long one or a preload list, because the policy is strict by design.
Final Checklist Before Publishing
Confirm each of the following before you consider the migration finished.
✓ All site URLs, including images and internal links, are updated to HTTPS.
✓ A permanent 301 redirect sends every HTTP request to its HTTPS version.
✓ No mixed content warnings appear in Chrome DevTools on key templates.
✓ The SSL configuration scores an A or A+ on the SSL Labs test.
✓ The certificate chain is complete, and renewal is automated and tested.
✓ Core Web Vitals are checked after enabling HTTP/2 or HTTP/3.
Secure Your WordPress Site With Confidence
Securing WordPress with SSL comes down to the right certificate, a clean installation, and switching WordPress fully to HTTPS, and it rewards the effort with stronger trust, better security, and a faster site. If you would rather hand the technical work to specialists, N6 Cloud can help at every stage. Our team can set you up with buy web hosting plans that include automated SSL and free migration, help you buy SSL certificate coverage in the DV, OV, or EV tier that fits your site, and run a full security review of your configuration. With more than twenty years of hosting experience, Canadian data centres, and 24/7/365 support, we can install your certificate, force HTTPS correctly, and confirm your grade so you can publish with confidence.